
Most successful blogs and websites rely on stats and analytics to analyze and understand the needs and behaviors of their online visitors.
WordPress.com offers various insights into page views, search keywords, and visitor location, but if you want a more in-depth analytics tool, you’ll probably want to use Google Analytics.
In this post, we’ll explain why you might want to use Google Analytics. Then, we’ll show you how to add it to your WordPress website in just four simple steps. Let’s get started!
Why You Might Consider Using Google Analytics
After you create a WordPress website, you can immediately access the Stats and Insights page. This will give you an overview of your web analytics, including page views, likes, and comments. You can also see what country your visitors are from and the search terms they used to access your content:

This basic information can be very useful if you’re just starting out as a website owner. It can provide a quick overview of your online visitors without overwhelming you. However, you’ll likely need more advanced data if you want to substantially grow your website.
That’s when Google Analytics can come in handy. This popular web analytics software includes many insights into your website traffic. Here are a few you’ll want to investigate immediately.
How did visitors find your site?
What percentage came from a Google search? How many clicked a link on a social networking site, and which ones? Facebook, Twitter, Instagram? Pinterest? Did some of the visitors come from links on other blogs and sites? Which of those are sending the most traffic?
Knowing how visitors find your site helps you determine where to focus. Aren’t getting enough traffic from search engines? Maybe you need to turn your attention to SEO. Seeing a little from Pinterest, but think your content would be appreciated by its users? Ramp up your attention there instead.
Where in the world are your visitors located?
Does this metric matter? Maybe, maybe not. Let’s consider when it might. A business that only serves local clients really don’t have a need to attract visitors from thousands of miles away. If your visitors aren’t coming from the area you are targeting, this is important information. Likewise, if notice that a particular location is sending a lot of traffic your way, you may decide to adjust your content or products to better fit their needs.
How are your visitors interacting with your site?

Using Google Analytics’ engagement reports, you can analyze how users interact with your content. This can include average engagement time per user as well as a number of conversions:
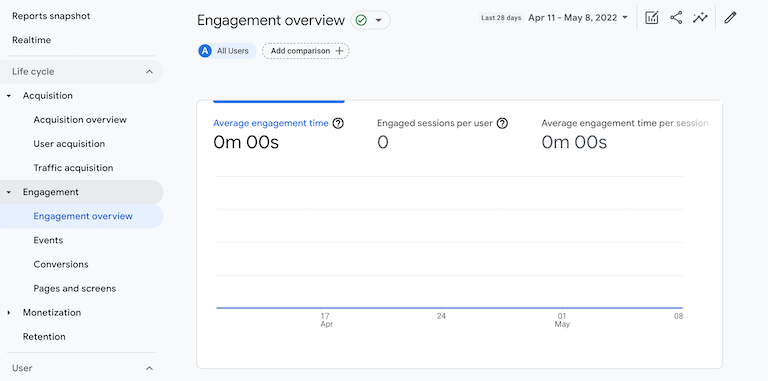
Which pages and posts are users spending the most time viewing? After reading one piece of content, where do most of them go next? Would you prefer they go somewhere else? Understanding user behavior helps you decide how to adjust your content and links to guide users in the right direction to meet their needs – and your goals.
How well does your site convert visitors into sales?
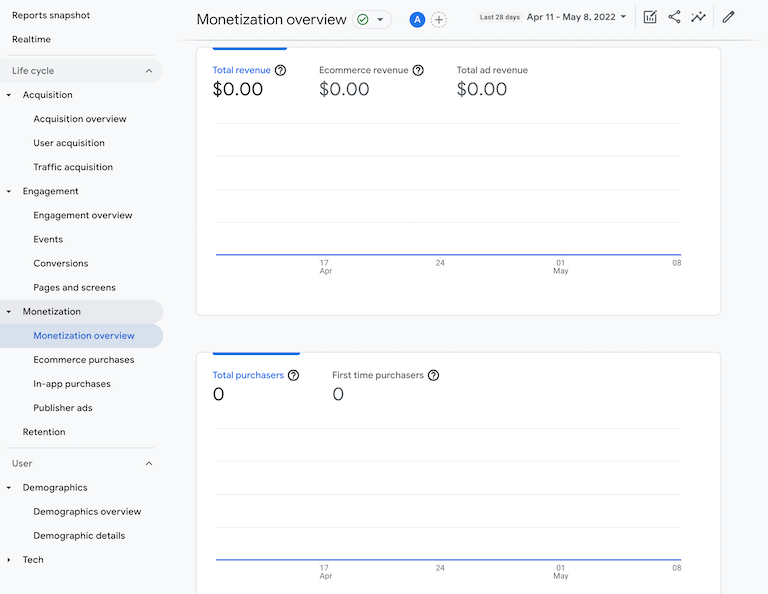
If you run an online business, you can also use Google Analytics to track your revenue. You can even find out what your most popular products are and how many customers are first-time visitors:
Need information that isn’t included by default?
If you need more specific information, you can create a custom report. This involves simply filling out specific metrics and how they should be displayed. By doing this, you can personalize and simplify your data so that it’s easier to analyze.
Want to solve problems?
Furthermore, Google Analytics can help you solve specific problems on your website. For example, it can allow you to identify if you have a significant bounce rate. Then, you can implement solutions to keep visitors on your website.
If you want to boost page views, you can use it to improve Search Engine Optimization (SEO) and launch advertising. Ultimately, information from Google Analytics can help you better understand user behavior and enhance your effectiveness.
How to Add Google Analytics to Your WordPress Website (In 4 Steps)
Once you decide to start using Google Analytics, you can easily integrate it into your WordPress website. Before you get started, you’ll need to upgrade to a WordPress.com plugin-enabled plan. This enables you to use Google Analytics for free.
Step 1: Create a Google Analytics Account
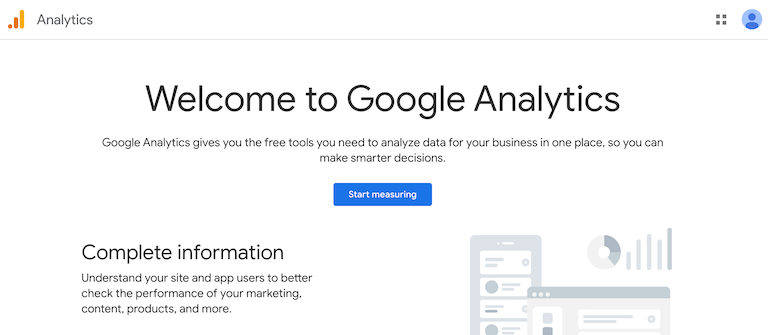
If you don’t already have a Google Analytics account, you’ll need to sign up for one. To do this, go to the Google Analytics website and click on Start measuring:
This will allow you to start creating a new account. First, you’ll need to fill in your account name. Then, you’ll see some details about data sharing:
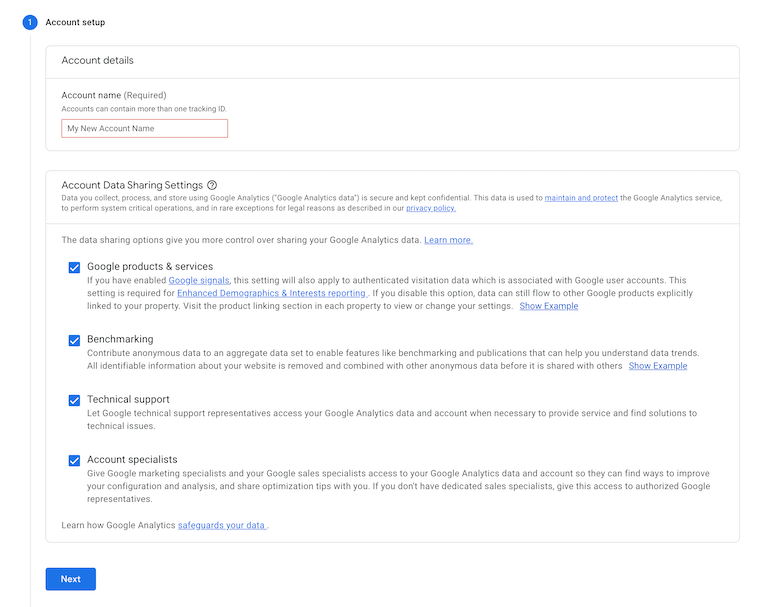
Although all four data sharing options will automatically be selected, you can opt out by deselecting them. This will customize how much of your data is shared with Google. When you’re finished making your selections, click on Next.
Now, you’ll need to set up a property. For the Property name, simply enter your site title. Then, select the correct time zone:
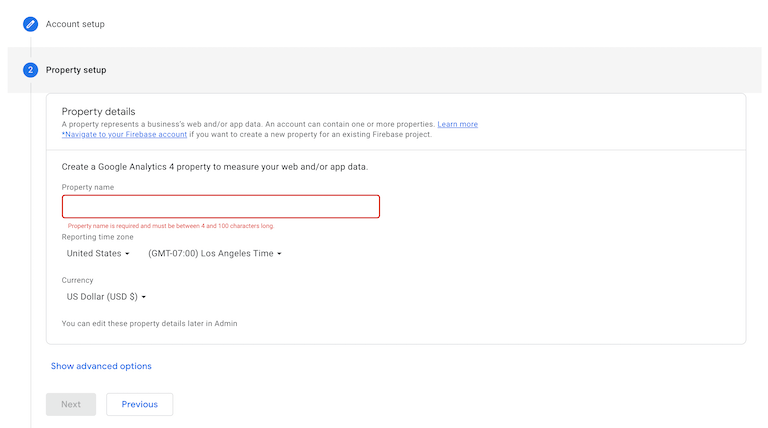
At the bottom of this page, make sure to enter the currency you use. After this, select Next.
To finish creating your account, the last step is to fill out your business information. First, select your industry category and business size:
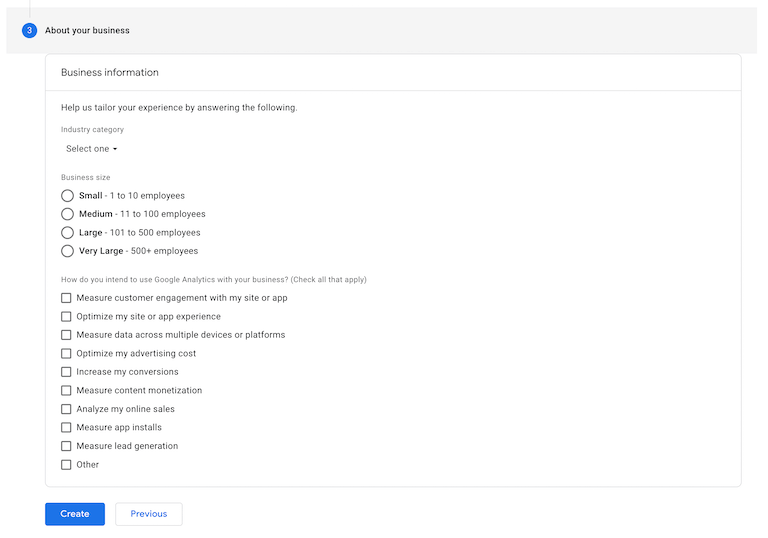
Then, answer how you intend to use Google Analytics. When you’re done customizing this information, go ahead and select Create.
Alternatively, you can sign in to your pre-existing Google Analytics account. Then, go to Admin > Create Account. You can proceed with the same steps for linking your WordPress site.
Step 2: Set Up a Data Stream
Before you can start using Google Analytics, you’ll need to accept the terms and conditions. In the automatic pop-up window, make sure to check the boxes and then click on I Accept:

Now, in order for Google Analytics to start collecting data, you’ll need to set up a data stream. Essentially, this allows your website’s data to be transferred to Google Analytics.
Once you accept the terms of service, you’ll be able to access your Google Analytics dashboard. Here, it should automatically direct you to the Data Streams page:

Under Choose a platform, click on Web. To set up your web stream, you’ll need to enter your website’s URL and site title:

By default, the Enhanced measurement option will be enabled. This enables Google Analytics to track page views, scrolls, outbound clicks, and more.
After filling out your website information, select Create stream. Then, you’ll be able to see the details of your new web stream:
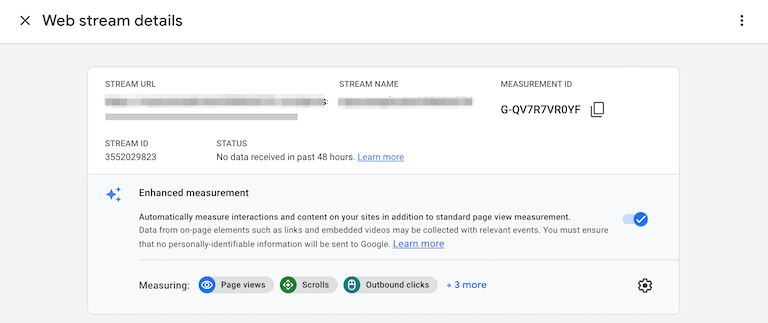
On this page, find the Measurement ID, located in the top right-hand corner of your screen. Then, copy this string of letters and numbers to your clipboard.
Step 3: Enable Google Analytics in WordPress
If you’re hosted with WordPress.com, using a WordPress.com plugin-enabled plan, this step is a breeze!
Once you copy your measurement ID, go to your WordPress dashboard. Then, navigate to Tools > Marketing:

This will take you to the Marketing and Integrations page. Here, click on the Traffic tab:

Then, scroll down to the Google section, where you’ll see an option for Google Analytics:
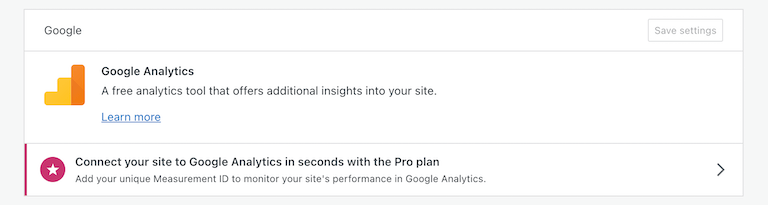
Now, paste the measurement ID that you copied earlier into the appropriate field:

Lastly, click on Save settings. This will automatically link your WordPress and Google Analytics accounts and start sending your data to Google. That’s it!
What if you are hosting your site elsewhere? Things get a little trickier in that case. Your best bet is to install a plugin on your site. GA Google Analytics is a popular choice. Once you’ve installed and activated that plugin, you’ll add the tracking ID to the plugin’s GA Tracking ID setting and select “Global Site Tag” in its “Tracking Method” setting. That will enable Google Analytics to start tracking.
Step 4: Enable E-Commerce Analytics (Optional)
If you run an online store, you can also customize Google Analytics for e-commerce. This can give you more insight into how many users view your products, add items to their carts, and complete transactions.
Although this step is optional, it will allow you to analyze your customers’ shopping and purchasing behavior, so we highly recommend it for e-commerce sites. This way, rather than viewing general information about your online visitors, you can use in-depth consumer analytics to improve your online business.
First, go to your Google Analytics account and turn on Enhanced E-commerce. Then, go back to the Traffic page of your WordPress dashboard. In the Google Analytics section, find Enhanced store analytics:

Select Enable Enhanced eCommerce. Below this, you can continue to customize the information that you want to track, including product detail views, clicks, and impressions. Once you’re finished, save your changes.
Now You’re Ready to Use Google Analytics
When you use Google Analytics, you can view reports and access detailed information about your visitors’ demographics and behavior. After you learn about your audience, you can then improve your SEO and advertising to boost views and engagement. Therefore, this can be an effective, affordable tool for growing your WordPress business.
Wait, Want More Insights Into Your Site Stats?
We’re glad you asked!
Pro Tip
Sign up for a free Google Search Console account, connect it to your Google Analytics account, and you’ll have access to a large amount of additional data that helps you see how your site is performing in Google search. For example, you’ll discover:
- Impressions: the number of times your pages (URLs) show up in Google search results
- Clicks: the number of times searchers clicked on your URL when seeing it show up in the search results.
- Average Position: The average position your URL showed up for all the search queries it ranked for. If your page ranked at #3 for one search and at #7 for a different search, the average would be 5.
- Click-through Rate: The percentage of clicks your page received based on the number of times it was shown to users in the search results.
You can make many decisions based on this kind of information. Here’s one example of why this data is useful.
Let’s say you see that one of your pages has an average position of 11. This means that it is currently showing up (on average) at the top of the second page of search results. It shouldn’t take too much effort to bump that ranking up to page 1 results, as page 1 includes the top 10 URLs for that search. If you have 10 pages showing up on page 2, it makes sense to spend a little time improving those pages and linking to them from other pages on your site. A small amount of work could lead to a rather large bump in impressions and visits.
Great idea, right? Here’s how to make that happen. Use this bonus mini-guide to connect your Google Search Console account to your Google Analytics account.
- Once you have both your Analytics account and Search Console account created, log into your Analytics account, and click the Admin link.
- Click the Property Settings from the Property column and scroll down to the Search Console settings.
- Select the reporting view of your property there, and click Save.
That’s all it takes to add new data to your Analytics reports. For more details, see Google’s help page.
Let’s Recap
To summarize, here are the four steps you can take to add Google Analytics to your WordPress website:
- Create a Google Analytics account.
- Set up a data stream.
- Enable Google Analytics in WordPress.
- Enable e-commerce analytics (optional).